

A How To Guide
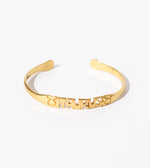
Embroidery: A How To Guide For Customizing Your Cleobella
The word embroidery comes from the French word broderie, meaning embellishment. It is an ancient form of needlework that has been used worldwide to adorn textiles for decorative and communicative purposes. In the earliest days of humankind, we can find evidence of embroidery. Fossilized clothing from 30,000 BC show decorative hand stitching in boots, clothing and hats. In Siberia, archaeologists have found shells with holes drilled into them and stitched into dating from 5000-6000 BC. In China, written instructions dating from 3500 BC were found describing how to embroider the date. It’s believed embroidery originated in the Middle East and Asia, when people discovered you could stitch animal hides together to make clothing or decorations. It was widespread and across cultures, having been used in Byzantium, India, China, West Africa.

It was used to embellish silk robes, and create beautiful decorations. For many years, it was seen as a respected craft, done to create items of high value. Possessing items that were embroidered was a sign of your wealth.
Because it was a craft, families passed down techniques to children to keep the tradition and their profession going. Over time, in Europe, it moved from being a craft to a hobby of wealthy young women. It was part of one’s social status to be able to stitch well and create beautiful patterns. Eventually the enjoyment of embroidery became something for everyone. In the 17th century, we find pattern books people used to help people create their own embroideries.
Preserving heritage techniques is at the forefront of Cleobella's design sensibility. Each of our designs are handmade with intention and provides sustainable incomes to artisans as well as 1% giveback to support women. We hope your personalized scarf becomes a daily reminder of the power of collective action.
Supplies you will need:
- Cotton Scarf
- Embroidery Needle
- Embroidery Floss (I used DMC 6 stranded cotton)
- 3 or 4 inch Hoop
- Scissors
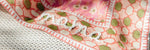
Step 1: Mark the name, letters, or symbol you would like to embroider on the handkerchief.
Step 2: Once you’re happy with the lettering, you’ll want to put the bandana in an embroidery hoop. If you’re embroidering on the edge of the bandana, it’s ok if the bandana doesn’t completely fit in the ring of the hoop. You just want enough support that the bandana doesn’t pucker while you’re stitching.
Step 3: Thread the needle and tie a knot in the end of the thread.
Step 4: We’re going to use the back stitch technique to embroider, but if you are more comfortable with another technique, that is perfectly fine too. Make a straight stitch from A to B. Skip some space and come up at C. Then bring your needle back down at D, right against the last stitch you made. Repeat the desired length.
